Lemon Cream with Meringue Tartlets

The beginning of my tartlet journey.

So I really like tarts, but they’re kind of difficult to share with people especially while you’re trying to social distance. ENTER: THE TARTLET.

I impulse bought some tartlet rings from Amazon and I’ve already gotten so much use out of them.

I decided to make a lemon cream tartlet while it is still technically summer, which involves this really luscious lemon cream which is light, delicate, and bright – unlike a baked lemon filling. And of course it’d taste good it’s like 50% butter.

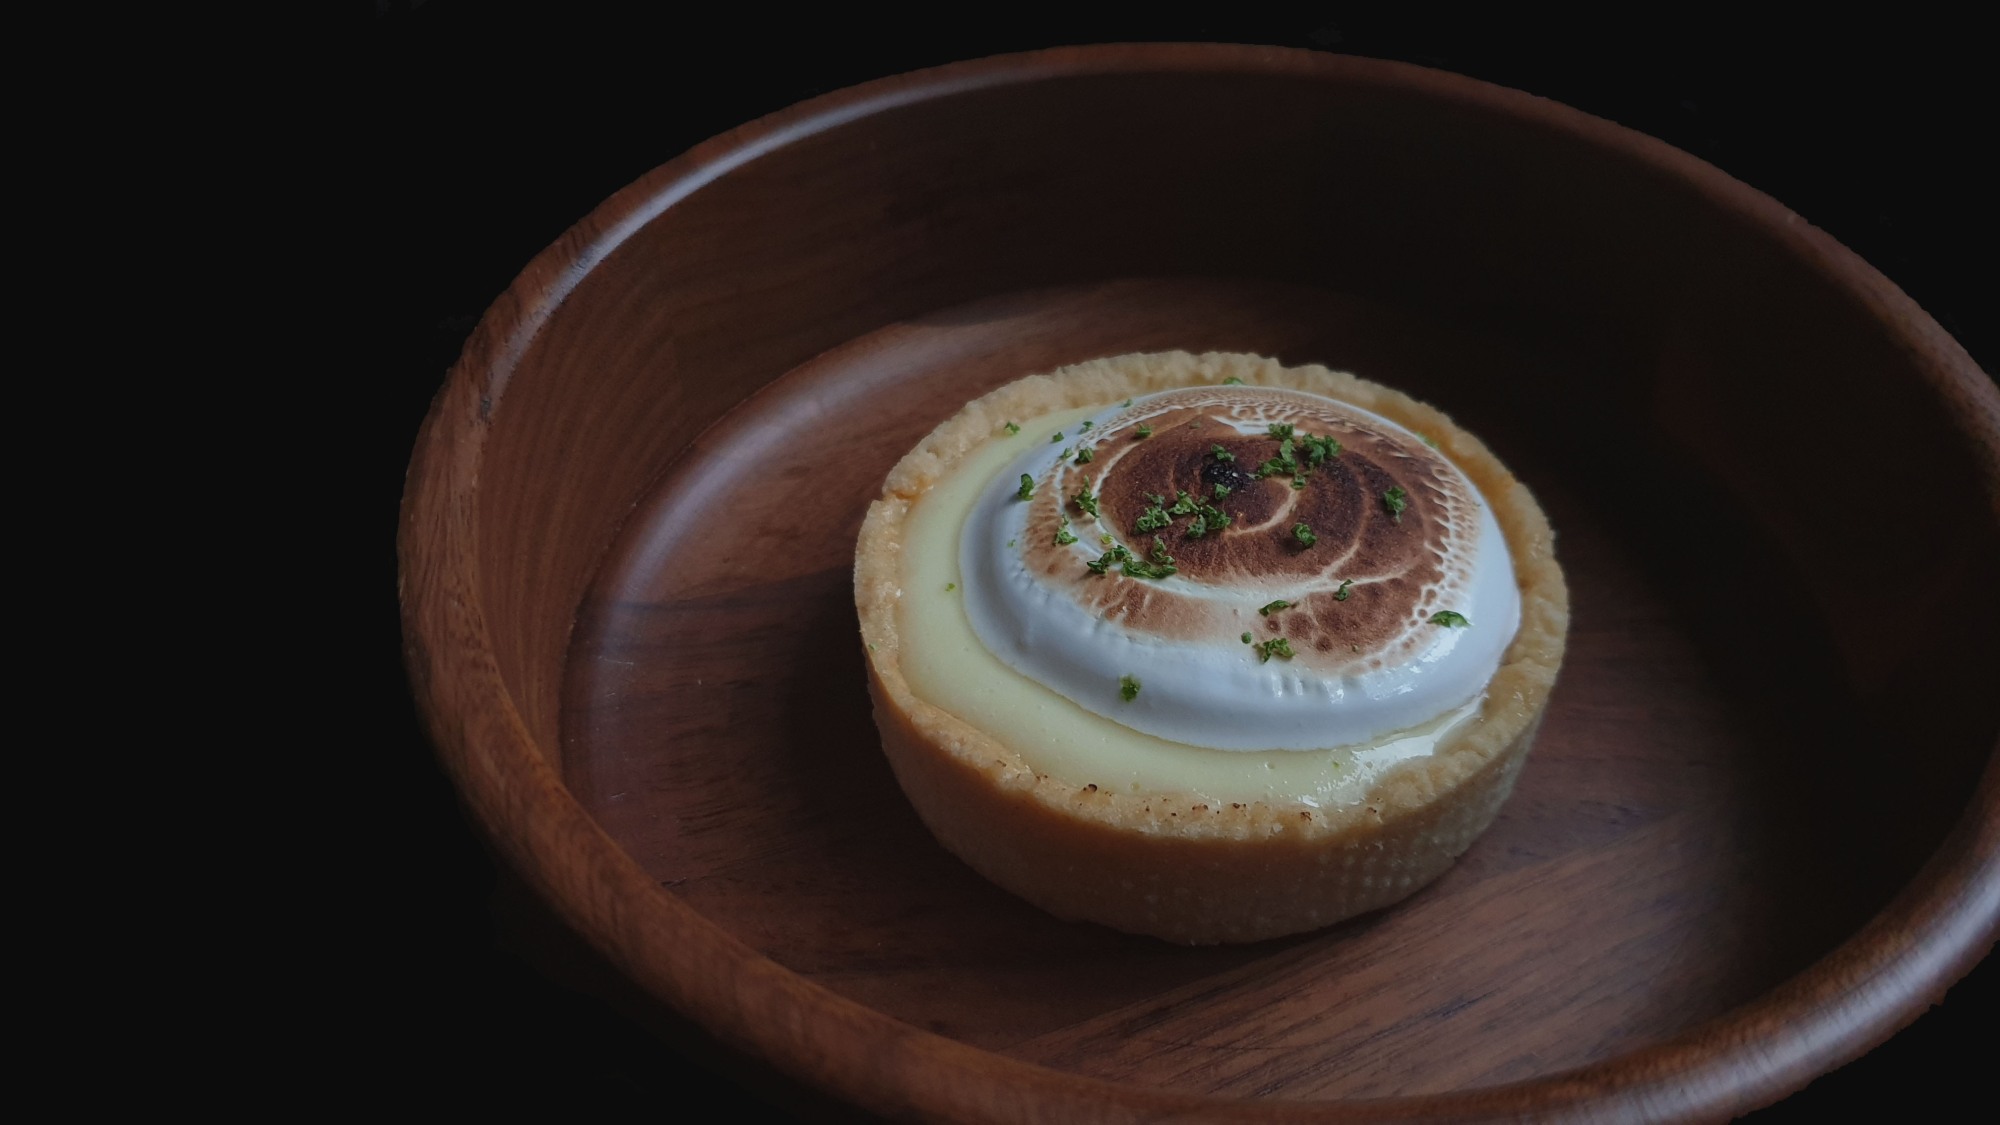
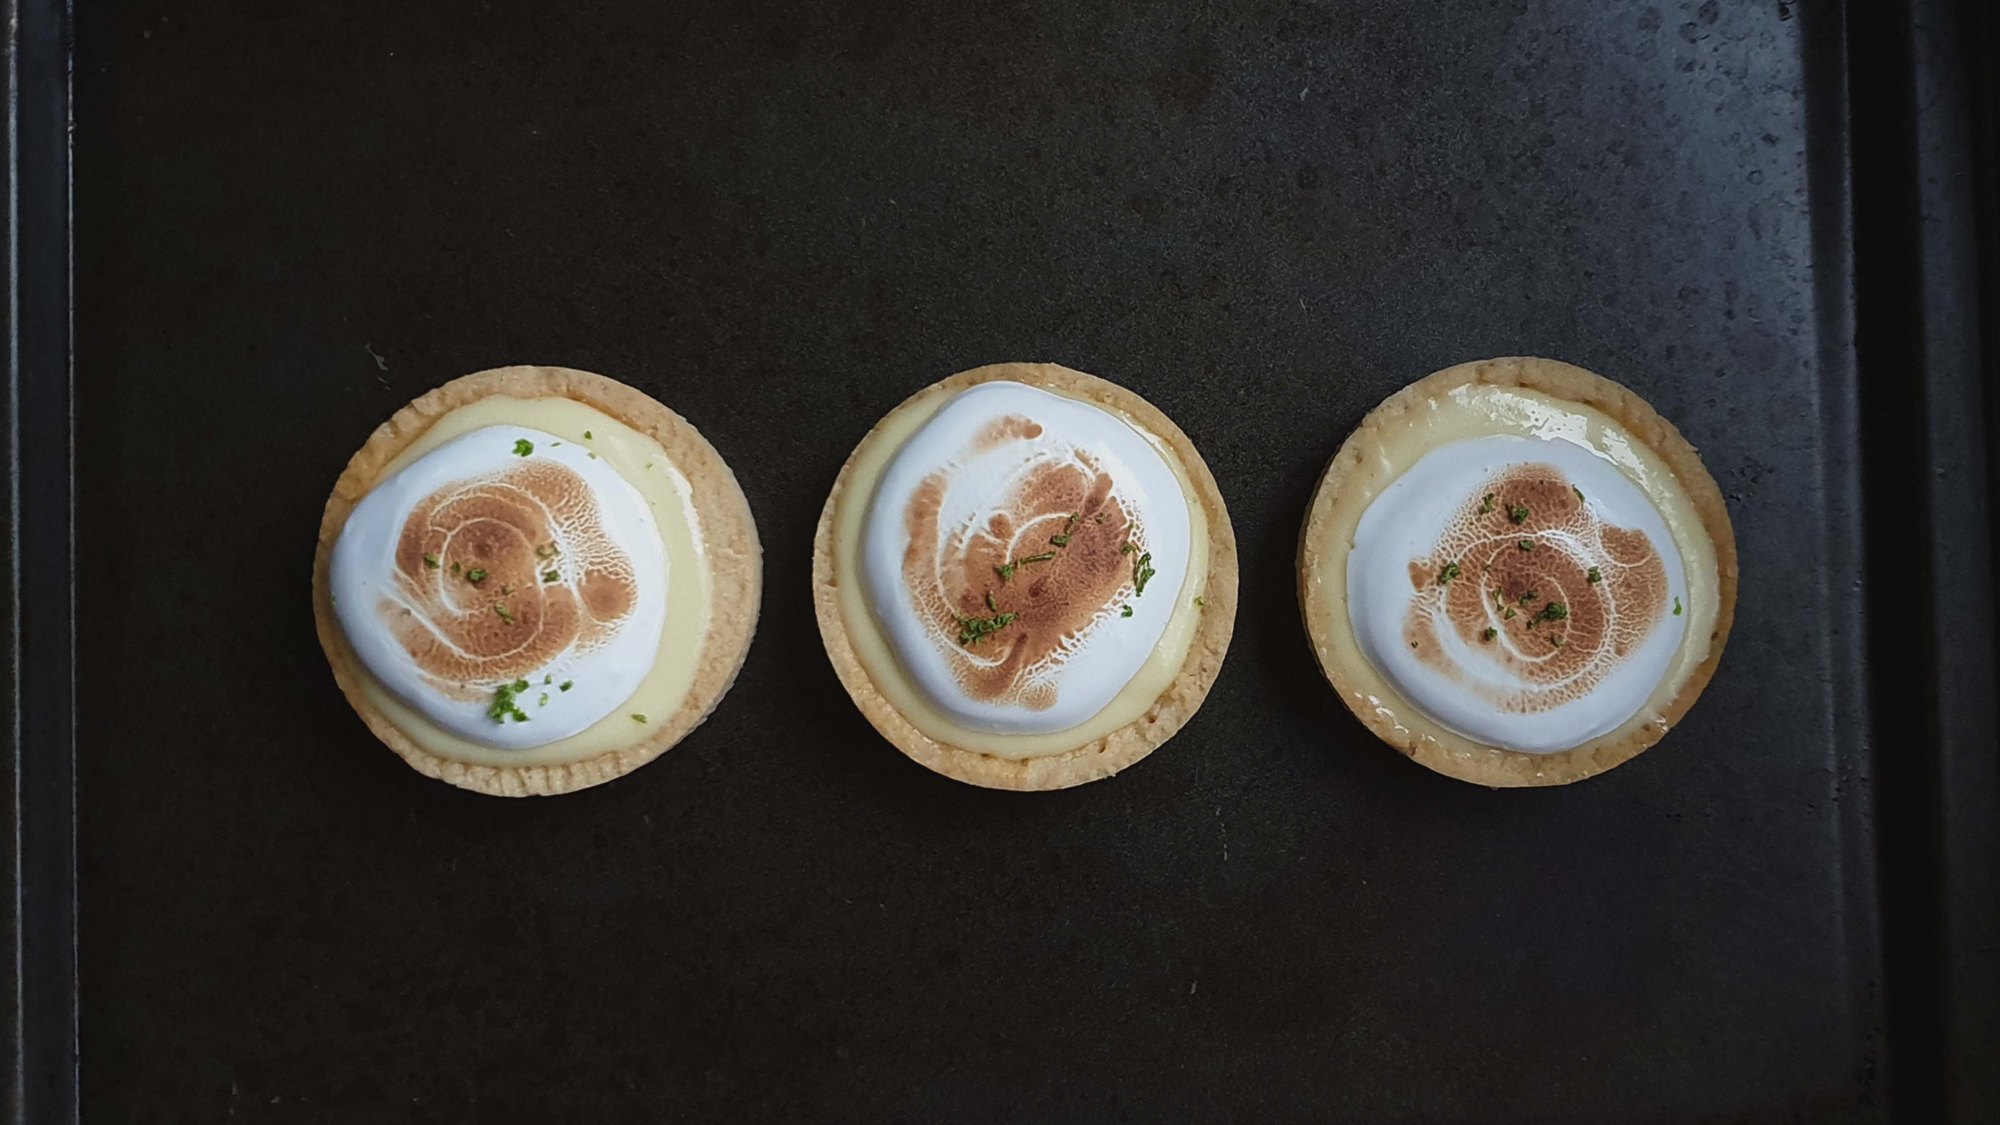
To contrast with the sharp filling (and to use up the leftover egg white) I topped the tartlet off with a sweet meringue topping, lightly toasted for the a e s t h e t i c s.

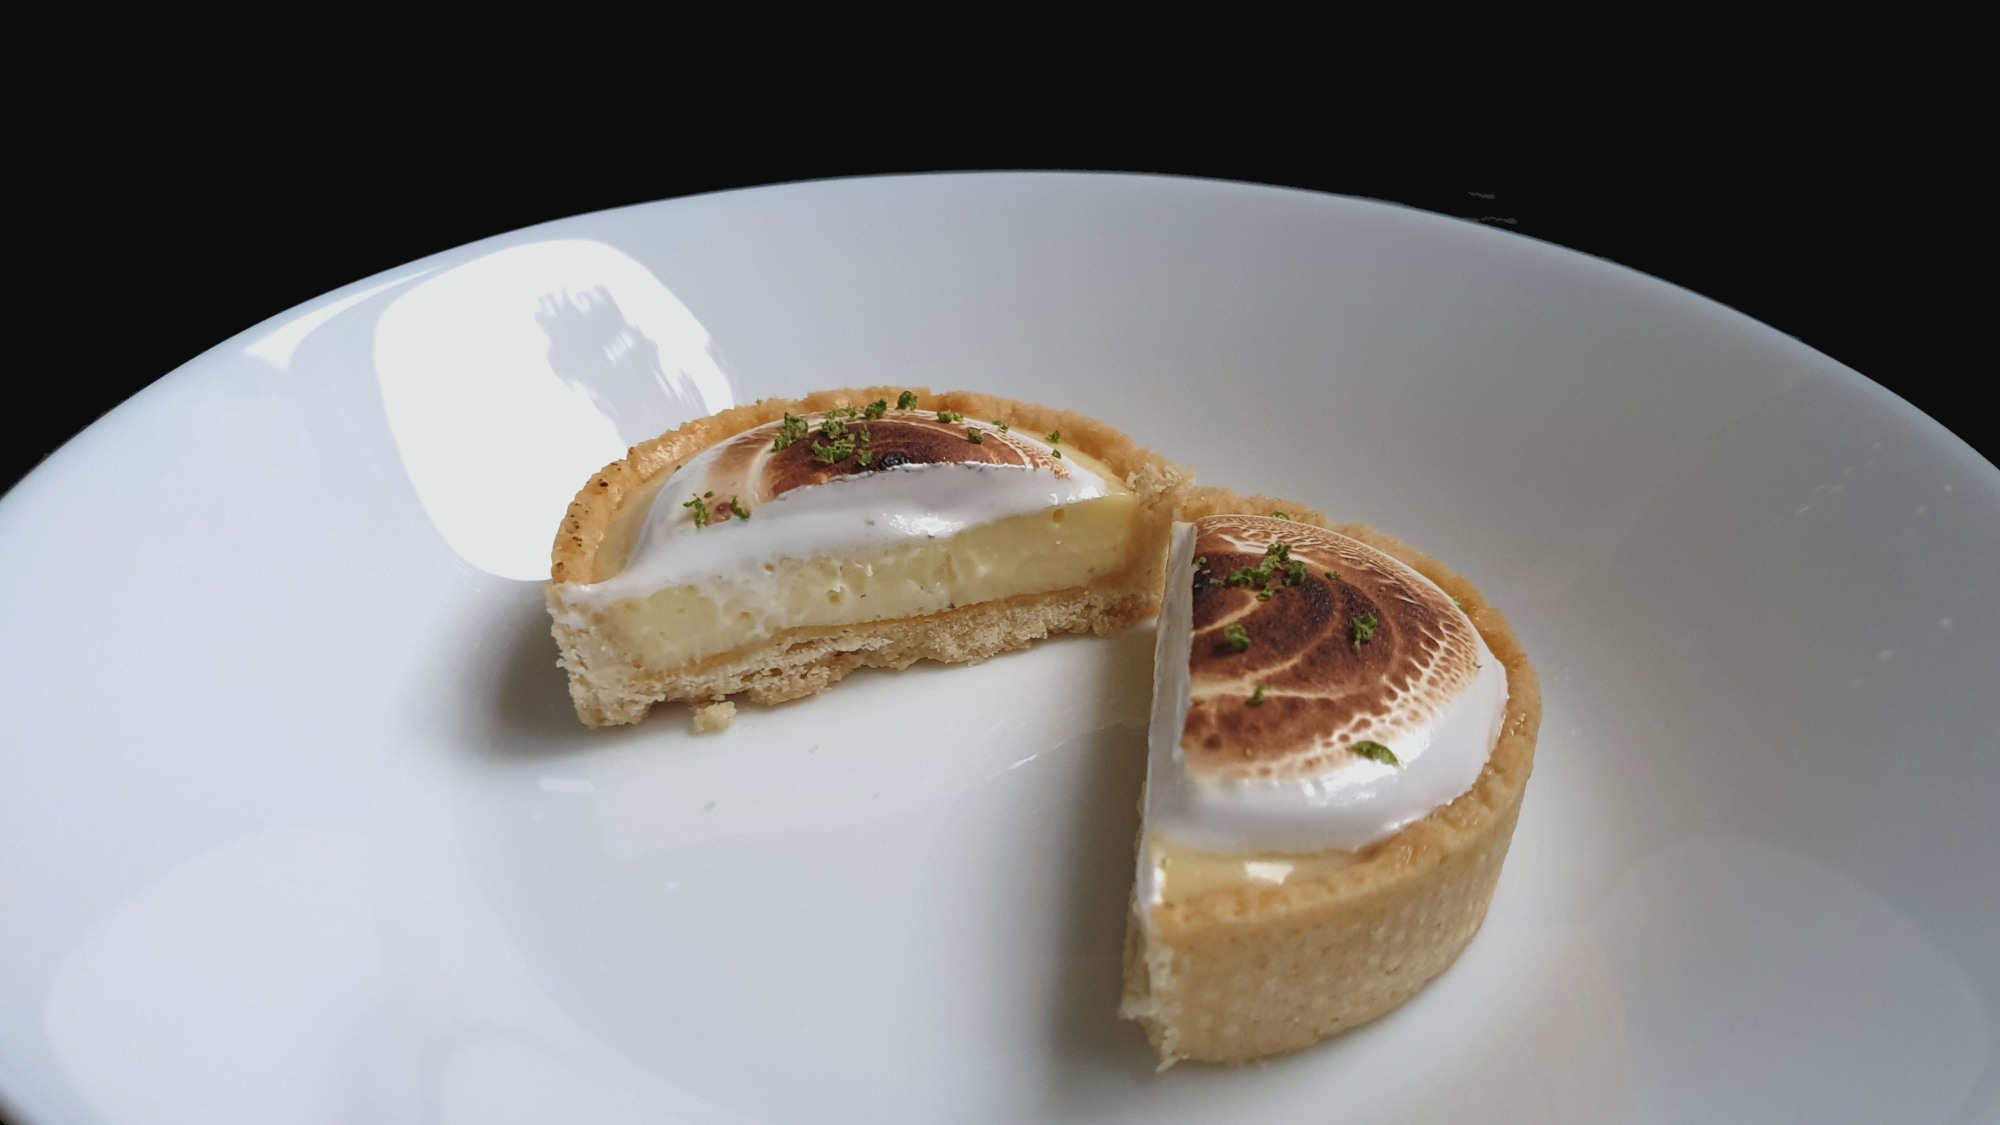
The tart crust itself is a very versatile and easy-to-work-with sweet tart crust or pâte sucrée.

This recipe is adapted from the Tartine cookbook, and I just added a Swiss meringue topping.

Ingredients (makes about 8 tartlets, maybe 9 if you’re really good at re-rolling out the dough. Each of my tartlet was 3.2 inches/8cm in diameter)

Sweet tart dough

  • 128g unsalted butter, room temperature
  • 100g sugar
  • 1/8 tsp salt
  • 2 large eggs, room temperature (1 egg will be used for the egg wash)
  • 250g all purpose flour

Lemon cream

  • 75mL lemon juice (from about 1-2 lemons)
  • 1 1/2 large eggs (to get 1/2 an egg I usually weigh out a cracked egg, beat the egg, and then add 1/2 the weight of the full egg back in)
  • 1/2 large egg yolk (the same principles apply lol)
  • 88g sugar
  • Pinch of salt
  • 113g cool unsalted butter

Swiss meringue (I had just enough for my tartlets and I decorated some of my tartlets with less meringue, if you want to fill up the entire tartlet top with meringue you’d have to double this recipe)

  • 1 large egg white
  • 53g sugar (1/4 cup)
  • Pinch of salt

To finish

  • Finely grated lime zest

Method

Sweet tart dough

  1. Beat the butter, sugar, and salt together until smooth.
  2. Mix in the egg until fully combined.
  3. Add flour and mix gently. Put in the fridge for a bit to firm up if too soft to work with at any time.
  4. Roll out the disc on a lightly floured surface until 3mm (1/8 inch) thick, rolling from the center toward the edge in all directions. Lift and rotate the dough a quarter turn after every few strokes, dusting underneath as necessary to discourage sticking, working quickly.
  5. Cut a circle of dough about 2 inches larger than your tartlet ring, easing in into the bottom and sides of your tartlet mould. Trim off any excess dough off the top.
  6. Put the pastry shell in a refrigerator until firm, about 15 mins.
  7. Meanwhile, preheat oven to 325°F/160°C.
  8. When the oven has preheated and your pastry shell has firmed up, dock the bottom and sides of the tarts with a fork (poke holes in it).
  9. Bake for about 10 mins. The tart should look lightly coloured, dry and opaque. Meanwhile, beat 1 large egg with a pinch of salt.
  10. After 10 mins, remove shells from oven and lightly brush the bottom and sides with the egg wash. Return to oven and bake until golden brown, about 20 mins longer (see notes).
  11. Let cool completely. Wrap it well and keep in a refrigerator for up to 1 week, or in the freezer for up to 2 weeks.

Lemon cream

  1. Over a double boiler, combine the lemon juice, eggs, egg yolk, sugar, and salt and whisk. Don’t let the egg yolks sit with the sugar for too long or the egg yolk will turn granular.
  2. Keep stirring until mixture is very thick, about 180°F/82°C on a thermometer, about 10-12 mins.
  3. Remove from heat and let cool to 140°F/60°C, stirring occasionally.
  4. Cut butter into 1 tbsp pieces. When the cream has cooled, blend with an immersion blender and add butter 1 tbsp at a time, blending each addition completely before adding the next piece. Cream will be pale yellow and opaque and quite thick.
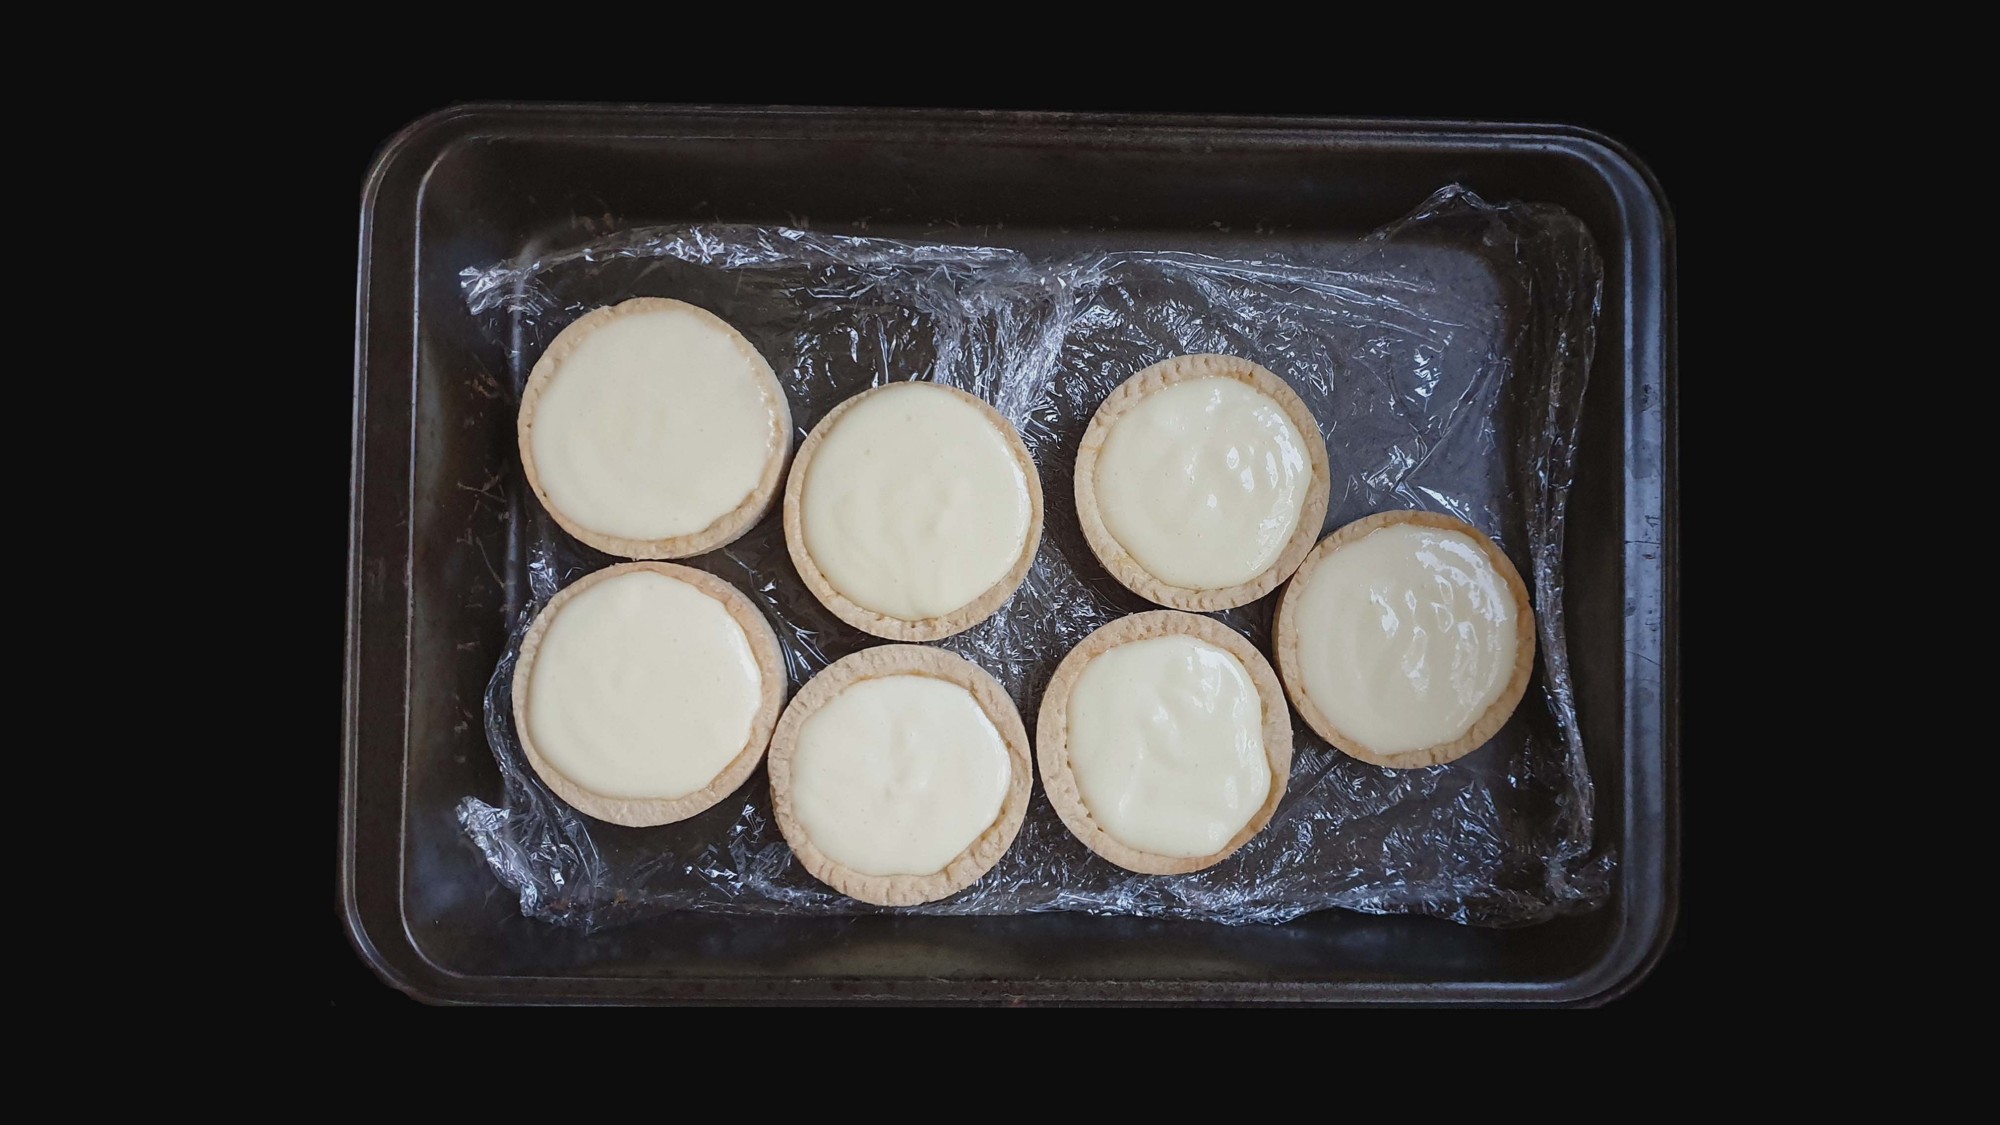
  5. Pour the cream into the prepared tart shell and shake the tart shell gently to smooth out the top. Chill the tart until firm, about 2 hours. The filled tart will keep in the refrigerator for up to 3 days.

Swiss meringue

  1. Place the egg white into a double boiler. Whisk with an electric whisk until the egg whites are foamy, then add the sugar and salt. Whisk until you cannot feel the sugar grains in the egg whites any more (should take about 3 mins).
  2. Remove the bowl from heat, and whisk until the meringue is cool stop at soft peaks if you want just a pool of meringue and keep whisking till stiff peaks if you want fancier designs.
  3. Place your swiss meringue into a piping bag and decorate the top of your chilled lemon tartlets with the meringue.
  4. Use a blowtorch to torch the meringue.
  5. Finish the tartlet with some lime zest.

Notes

  • I baked my tartlet much longer than the recipe in the book (like double the time) because the tartlet never took on much colour. I thought my timing came out perfect but you do you man.
  • If you use a perforated tart ring like me, you can use a sharp knife to scrape off any bumps left behind by the perforation.
  • Transport carefully! The meringue is prone to sliding around the top of the lemon cream.
  • This recipe can also make a normal 9 inch tart! A large tart might take longer to bake – just watch the colour of the tart.
  • The egg wash in the middle of baking the tart shell helps with preventing a soggy bottom.

Double Strawberry Cake with Cream Cheese Frosting and Ruby Chocolate Ganache

A celebration of strawberries.

This cake starts off with double strawberry cake layers – double because it contains both strawberry puree and freeze-dried strawberries. This means that you get a very pronounced strawberry flavour without any artificial flavouring, and you also get a lovely naturally pink colour that is retained even after baking.

The cake layers are sandwiched with a quick cream cheese frosting which uses NO powdered sugar so it’s not sickly sweet. Whipped cream is also incorporated into the frosting so it’s fluffy, but still able to hold its shape.

I decided to colour a bit of the frosting with some freeze-dried strawberries in order to get a ~gradient~ look.

I topped the whole thing off with some strawberries (glazed with some apricot jam to give the strawberries a good shine), and some ruby chocolate ganache. I thought the berry notes in ruby chocolate would play off well with the strawberries, and of course its colour also went along thematically.

The recipe for the cake and frosting is from Stella Parks, just adapted to fit my 6-inch pan.

Ingredients (for a 3-layer 6-inch cake)

Strawberry cake

  • 313g bleached cake flour
  • 43g strawberry powder (from putting some freeze-dried strawberries into a food processor)
  • 340g strawberries
  • 2 sticks butter (227g), softened but not too soft
  • 296g sugar
  • 1 tsp baking powder
  • ¼ tsp baking soda
  • 1g salt
  • Pinch 5-spice powder
  • 113g egg white (somewhere between 2-3 large egg whites), room temperature

Strawberry cream cheese frosting

  • 200g sugar
  • 280g heavy cream, cold (1 1/3 cup)
  • 10g vanilla
  • ¼ tsp salt
  • 2 bricks Philadelphia cream cheese, cold (450g)
  • Around 15g crushed freeze-dried strawberries

Ganache

  • ¼ cup heavy cream
  • 85g ruby chocolate
  • Pink food colouring (optional, but you get a grey cast if you don’t use colouring)

Decoration

  • Strawberries
  • Apricot jam
  • Crushed freeze-dried strawberries

Method

Strawberry cake

  1. Combine the cake flour and freeze-dried strawberries in a food processor and grind to form a powdery, pale pink flour with no visible pieces of fruit. Set aside.
  2. Puree fresh strawberries until smooth, bring to about 70°F/21°C before using.
  3. Adjust the oven rack to a lower-middle position and preheat to 350°F/180°C. Grease your 6-inch baking pan(s), and line with baking paper.
  4. In a large bowl, cream together the butter, sugar, baking powder, baking soda, salt, and five-spice powder. Cream until fluffy and light, about 5 mins on medium speed if using a stand mixer. Pause to scrape down the bowl halfway through.
  5. Add egg whites a little at a time, beating it in to fully incorporate before adding the next addition.
  6. Fold in 1/3 of the strawberry flour, and then mix in 1/3 of the strawberry puree. Repeat with remaining flour and fruit, working in thirds as before.
  7. When the cake batter is well combined (the colour should be homogeneous), divide the batter evenly between prepared cake pans. If you only have one cake pan you can bake in batches, just hold the batter at room temperature, covered.
  8. Bake in the preheated oven for about 45 mins, or until cakes are puffed and firm (or to an internal temperature of 200°F/93°C. I did bake quite a deep cake, so if you’re baking a thinner cake start checking around 30 mins).
  9. Let the cakes cool in their pans for an hour, then invert onto a wire rack, peel off the parchment, and return the cakes right side up. Covered in plastic, the cakes can be left at room temperature for a few hours. Meanwhile, make your frosting.

Cream cheese frosting

  1. Add the sugar to a large bowl, and then refrigerate until they have cooled to maximum 70°F/21°C. Keeping the frosting cold is key to the structural integrity of this frosting.
  2. When the bowl and sugar is cold enough, add the cream, vanilla, and salt to the bowl. Mix at low speed just to dissolve the sugar, then increase the speed to high and beat until the cream is as thick as Greek yogurt.
  3. Begin adding cream cheese 2 tbsp at a time, beating in between each addition just to incorporate the cream cheese. The frosting may look a bit curdled at this point but this is just because we haven’t mixed everything together well enough yet.
  4. Scrape down the bowl, and then whip at high speed until the frosting is smooth and light (about 2-3 mins on a stand mixer). After whipping, the frosting should be about 60°F (16°C).
  5. Take out about 4 tbsp of frosting and add about 1 tbsp of crushed freeze-dried strawberries (I just eyeballed this). Mix well until the frosting is coloured pink uniformly.
  6. Transfer the 2 frostings to separate piping bags. Use immediately or refrigerate until needed.

Assembly

  1. When all the cake layers have been baked and cooled, level off each cake layer with a serrated knife so they are flat.
  2. Crumb coat the cake – Top the first cake layer with some frosting and spread it to the edges. Repeat with the second and third layer, then cover the sides of the cake and spread it smoothly. Refrigerate until the frosting is firm, about 30 mins.
  3. Pipe some of the pink cream cheese frosting around the bottom of the cake, and then pipe some of the white cream cheese frosting around the rest of the cake. Using a bench scraper, smooth out the frosting until the frosting looks smooth.
  4. Pipe some dollops of cream cheese frosting around the top of the cake, and sprinkle some freeze-dried strawberries. Place some strawberries in between each dollop of frosting.
  5. Take about 2 tbsp of apricot jam into a cup and stir vigorously to loosen – you might have to microwave it briefly if the jam remains stiff. Brush the strawberries with some apricot jam.
  6. To make the ruby chocolate ganache, chop the ruby chocolate into small pieces and put in a heatproof bowl. Microwave the cream until it is steaming/small bubbles just start to form around the edge, and then pour into the bowl with the ruby chocolate. Let sit for a minute, and then stir well to combine. Colour with pink food colouring. Transfer to a piping bag and let cool for about 20 minutes so it isn’t as runny. Decorate the middle of the cake.
  7. Refrigerate the cake, but let slices sit out for about 5-10 minutes before serving.

Notes

  • It’s important to use bleached cake flour for the right cake texture.
  • The butter should be warm enough that you can cream it with the sugar, but not too warm that creaming doesn’t happen.
  • I bought my freeze-dried strawberries from Trader Joe’s.

Lavender Shortbread Cookies

So ~delicate~ and romantic.

This is a variation of the chocolate chunk shortbread from Alison Roman (of Marie Kondo Beef fame). I think it’s just a great crumbly melt-in-your-mouth shortbread base to start with, and the demerara(rararara) sugar that coats each cookie is a great touch to add some extra crunch.

I added some lavender because I was in a bit of a floral mood, and to add some nice aroma to the cookies.

The base of this recipe is from Alison Roman’s viral cookbook Dining In, although it can be found on Bon Appetit’s website (RIP). I just changed up the flavour a bit.

Ingredients (makes about 24 cookies)

  • 2 1/4 sticks/255g cold salted butter, cut into cubes (alternatively you could replace with unsalted butter and add 3/4 tsp of salt but Alison Roman swears you get a deeper salt flavour with the salted butter so that’s what I stuck with)
  • 1/2 cup/100g granulated sugar
  • 1/4 cup/50g light brown sugar
  • 1 tsp vanilla
  • 2 1/4 cups/281g all purpose flour
  • 1.5 tbsp dried lavender flowers (use 1 tbsp if you just want a hint, or if you have particularly pungent flowers). plus about 2 tsp extra for garnish at the end
  • 1 large egg, beaten, to coat the cookies at the end
  • Demerara sugar, to coat the cookies at the end

Method

  1. In a food processor, process the dried lavender flowers with the granulated sugar until the flowers are ground up.
  2. Using an electric mixer, beat the butter, sugars (including the ground up lavender flowers), and vanilla on medium-high speed until light and super fluffy and it looks like frosting, about 3-5 mins (see notes if you don’t have a powerful enough mixer).
  3. Scrape down the sides of the bowl with a spatula and fold in the flour, just enough to blend.
  4. Divide the dough into half, and place each piece onto a large piece of plastic wrap. Roll the dough into a log about 2″ in diameter, squeezing the dough tightly together, and wrap completely in plastic wrap. Chill until firm, at least 2 hours (I just leave mine in the fridge overnight – I always feel that cookies taste better after a long rest).
  5. Preheat the oven to 350°F/180°C. Line 2 sheet pans with baking paper.
  6. Brush the outside of the logs with the beaten egg, and roll in demerara sugar.
  7. Slice each log into 1/2 inch thick rounds (this might be easier if you use a sharp serrated knife), and place on the prepared sheet pans about 1 inch apart (they won’t spread much). Sprinkle each cookie with a bit of lavender flower to decorate.
  8. Bake in the preheated oven until the edges are beginning to brown, about 12-15 mins. The cookies themselves will not take on much colour.
  9. Let cool slightly before eating (the recipe claims that it tastes best at room temperature but I think the cookie tastes great both warm and at room temperature, just in different ways).
  10. Store in an airtight container at room temperature once the cookies have completely cooled.

Notes

  • If you don’t have a strong enough mixer to cream together sugar with cold butter (like me), just cream the sugar together with room temperature butter (but not too warm or it won’t cream lol). I don’t really buy her thing about creaming cold butter honestly.
  • The cookie dough can be kept up to a week in the fridge, and up to a month in the freezer. Baked cookies can be stored in an airtight container for 5 days.
  • When slicing the cookies, your cookie will probably crumble apart. Just squeeze any pieces that crumbled off back together. Thicker cookies will be more likely to retain their shape – the key is to just remain consistent so all the cookies bake at the same rate.

Brown Butter Financiers

Perfect snacking material.

These are little buttery nut-enriched cakes which are light enough to snack (and keep snacking) on but still surprisingly moist and flavour-packed. A staple of French bakeries, financiers are usually baked in rectangular molds but I had a madeleine pan and wanted to use them okay.

The flavours here are amped up with the incorporation of brown butter, giving a milky, butterscotch flavour to the financier.

I really like this recipe because it comes together so quickly and you get a great snack in the end. Perhaps the recipe with the best effort to payoff ratio on this blog. I brought some of them to work the next day and they were all gone within a couple of hours.

The recipe is adapted from David Lebovitz.

Ingredients (makes about 18 madeleine-shaped financiers, each cavity in the mold I used was 3.5 inches long and 2 inches wide)

  • 140g almond flour
  • 180g sugar
  • 45g all purpose flour
  • Generous pinch salt
  • 4 large egg whites, room temperature
  • 1/2 tsp vanilla
  • 75g brown butter (about room temperature but still in liquid stage). You can get 75g brown butter from around 115g unsalted butter.
  • About 1 tbsp melted unsalted butter to grease the molds

Method

  1. To brown the butter, melt 115g unsalted butter in a saucepan over medium-low heat. When the butter has melted, increase the heat to medium and simmer the butter, stirring with a spatula. Continue cooking and stirring, scraping up any brown fats that form along the bottom of the pan, until butter is golden yellow and silent (indicating the water has entirely boiled away). This should take about 15 minutes.
  2. Set the brown butter aside to cool.
  3. Meanwhile, preheat the oven to 375ºF/180ºC and brush the madeleine molds with some melted butter. Leave the molds in the fridge while you prepare the financier batter.
  4. In a large bowl, mix together the almond flour, sugar, flour, and salt.
  5. Stir in the egg whites and vanilla, then the brown butter.
  6. Take the madeleine mold out of the fridge and brush with a second layer of melted butter– just to make extra sure that the financiers don’t stick.
  7. Fill each mold 3/4 full, and rap the molds on the counter to level the tops.
  8. Bake in the preheated oven for about 13 minutes, or until each financier is dark brown around the edges and springs back slightly when you touch them.
  9. Cool the financiers in the molds, then remove them.
  10. Store the financiers in an airtight container at room temperature.

Notes

  • This is one of those recipes which taste just as good the next day, so if you need to bake something in advance for a potluck or something this would be a great choice.
  • If you don’t want any dark specks from the brown butter in your cakes, you can try to avoid scraping the dark bits from the bottom of your pan when pouring the brown butter out, but I think the dark bits are the flavourful bits and recommend keeping them in (and explaining that it’s not dirt to any skeptics).
  • This batter is very forgiving and can be baked in a variety of molds – like mini-muffin tins, or larger muffin tins, or of course the OG rectangular molds. Just adjust the baking time.

Mixed Berry Sherbet

Straddling the line between sorbet and ice cream.

20200712_214640 copy

This recipe uses a sorbet base but then adds a bit of fat (in other words…the definition of sherbet as I found out after a short google). Usually with sorbets the lack of fat helps the flavour really punch through, but then the flavour is gone really quickly. In this recipe the addition of a little bit of fat helps the flavour last a bit longer.

Mixed Berry Sorbet

I’m kind of on the fence whether I’m into this hybrid situation though. Especially in this hot weather I think I was really seeking the refreshing nature of sorbet. The bit of fat in this recipe does its job of letting the berry flavour linger, but also it was just rich enough that I was rarely in the mood for it. In Singapore we would call this jelak, or that I was sick of eating it after a while. Maybe when the weather gets a bit cooler it would be this sherbet’s time to shine.

This ice cream is from the Salt and Straw cookbook.

Ingredients

Sorbet base

  • 1 cup/200g sugar
  • 1/2 tsp xanthan gum
  • 1/4 cup/100g light corn syrup
  • 1 1/4 cups water

Everything else that makes this a mixed berry sherbet

  • 12 ounces/340g frozen mixed berries
  • 1/2 cup boiling water
  • 1 tbsp freshly squeezed lemon juice
  • 1/4 tsp salt
  • 1/2 cup heavy cream

Method

Sorbet base (the day before)

  1. Stir together the sugar and xanthan gum in a small bowl.
  2. In a saucepan, combine the water and the corn syrup.
  3. Whisk in the sugar mixture.
  4. Heat over medium heat, stirring often and adjusting the heat to prevent a simmer, until the sugar has fully dissolved (about 3 mins). Remove the pot from the heat and let cool completely.
  5. Transfer the mixture to an airtight container and refrigerate until well chilled, at least 4 hours but preferably overnight.

Everything else

  1. The day before, put the berries, boiling water, lemon juice, and salt into a blender and blend until as smooth as possible. Refrigerate (blender jar and all) until cold.
  2. The next day, add the sorbet base and cream to the blender and briefly blend to combine.
  3. Pour the mixture into an ice cream maker and turn on the machine, and churn until the mixture has the texture of soft-serve.
  4. Cover the ice cream with parchment paper (I think this is to prevent freezer burn), pressing it to the surface of the ice cream so it adheres, and cover with a lid.
  5. Freeze the ice cream until solid, at least 6 hours. This will keep for up to 3 months.

Notes

  • Xanthum gum is a thickener/stabiliser commonly used in vegan/gluten-free baking, so that’s where you might find them in the supermarket. I got the Bob’s Red Mill brand.
  • If you’re using an ice cream maker which bowl needs to be frozen beforehand, make sure to cover the bowl with clingfilm so ice crystals won’t form in the bowl and cause your ice cream to have a sandy texture. Also to be safe, freeze the bowl for at least 2 days and at the coldest setting your freezer will go.
  • My ice cream maker takes about 20-30 minutes to reach soft-serve consistency.