Truffles Four Ways (Ruby Chocolate with Raspberry Ganache, Dark Chocolate with Coffee Ganache, Salted Dulce de Leche, 70% Valrhona Guanaja Ganache)

The ultimate try-hard gift.

truffles 4 ways

I’ve previously written at length on how important it is to temper chocolate when making truffles (or at least 3 of these truffles), but in short you need to temper them so they stay snappy at room temperature but melt in the mouth, so they are nice and shiny, and also so they actually unmould from the chocolate moulds.

And also just use a sous vide it makes tempering chocolate so much easier.

truffles group shot

If you too would like to fold these truffle boxes I followed the instructions here.

Before we get into the nitty-gritty of the recipes, some general notes:

  • You’d only need to temper the chocolate if you’re using real chocolate (ie chocolate that contains cocoa butter and does not contain vegetable oils/fat).
  • This video is good to follow along for how to use a chocolate mould.
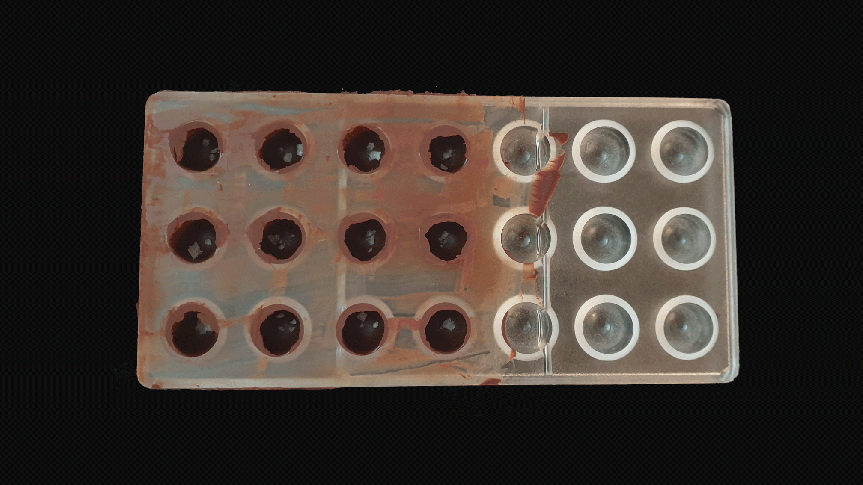
  • This was the mould I used, the truffles end about being about an inch in diameter and 3/4 inch tall.
  • I polled 11 people what their favourite flavour was and the results are in:
      • Ruby truffle (2 votes)
      • Coffee truffle (3 votes)
      • Dulce de leche truffle (3 votes – and my personal favourite)
      • 70% ganache truffle (3 votes)

    So overall I was pretty happy with the flavour distribution in this box, there truly is one for everyone.

ruby chocolate raspberry ganache

Ruby chocolate is like this new (very Instagrammable) 4th type of chocolate (ie not milk, dark, or white). It’s made from a different kind of cocoa bean from what we’re used to, and kind of has more of a fruity, sour taste to it.

ruby-chocolate-raspberry-ga

To go with the berry notes of the ruby chocolate, I filled the ruby chocolate truffles with a raspberry white chocolate ganache. Tempering wise, ruby chocolate behaves like milk chocolate so follow those temperatures accordingly.

Ingredients (makes about 12)

Chocolate shells

  • About 200g of ruby chocolate (you will have extras leftover)

Raspberry white chocolate ganache

  • 60g heavy cream
  • 15g corn syrup
  • 125g white chocolate
  • 17g unsalted butter, room temperature
  • About 1/2 cup freeze-dried raspberries (I didn’t really measure, add to taste)

Method

Tempering chocolate

  1. Finely chop the ruby chocolate and add it to a waterproof bag. Place the bag in a sous vide set to 42°C (107°F). Massage the chocolate as it is melting to ensure you don’t get any weird streaks in the end, until all the chocolate has melted.
  2. Pour away 3/4 of the water you used, and add some room temperature tap water back in your sous vide (in order to bring the temperature down faster). Set the temperature to 27°C (81°F), and put the bag containing the chocolate back to the sous vide. Add some ice cubes if the temperature isn’t dropping fast enough. Massage the chocolate continuously as it cools in the sous vide.
  3. After 3 minutes at this temperature, set the sous vide to 29°C (84°F). Continue to massage the bag. After 5 mins at this temperature the chocolate is ready to use, and you can just hold the chocolate at this temperature until you’re ready to use.

Raspberry white chocolate ganache

  1. In a measuring cup, blend the heavy cream, corn syrup, and freeze dried strawberries using an immersion blender.
  2. Pour the mixture into a sauce pan until it starts to simmer. Meanwhile finely chop some white chocolate and place in in the measuring cup from earlier.
  3. When the cream mixture has started to simmer, pour the cream mixture over the white chocolate. Let sit for 1 minute, then blend with an immersion blender until smooth. When the mixture has cooled slightly (to about 40°C), add the butter and blend until smooth.
  4. Let ganache cool to room temperature before using.

Assembly

  1. Pour the tempered ruby chocolate over the chocolate mould, ensuring the chocolate fully coats the sides of the cavities. Tap on the sides of the mould to release any air bubbles.
  2. Invert the mould onto a clean surface, and let the ruby chocolate drip out onto the clean surface. When the chocolate has dripped out, clean the surface of the mould with a bench scraper, and let the mould set at room temperature while still inverted. Collect the leftover chocolate that has dripped out and reuse.
  3. When the chocolate has set, fill the mould up with the ganache, leaving some room for some chocolate to go on top (don’t fill the truffle past the top).
  4. Cover the ganache with chocolate, tapping on the sides of the mould to release air bubbles. Scrape off any excess chocolate.
  5. Let the truffles set at room temperature, then unmould the truffles by turning the moulds over and tapping the mould sharply onto a surface.
  6. Store truffles in airtight container at room temperature.

coffee truffles

This has a really intense coffee filling – enough that some might have to use the toilet after eating too many of these truffles.

coffee-ganache-chocolate

The coffee filling was paired with a milky chocolate to offset the bitterness.

The recipe for the filling was adapted from here, I just really amped up the coffee.

Ingredients (makes about 12)

Chocolate shells

  • About 200g milk chocolate (there will be leftovers)

Coffee ganache

  • 45g heavy cream
  • 4g coffee beans
  • 4g instant coffee (to taste, I just kept adding more and more instant coffee until I was satisfied with the taste, maybe start with 2g of instant coffee)
  • 55g dark chocolate
  • 13g milk chocolate
  • 13g unsalted butter, room temperature

Decoration

  • Coffee beans

Method

Tempering chocolate

  1. Finely chop the chocolate and add it to a waterproof bag. Place the bag in a sous vide set to 42°C (107°F). Massage the chocolate as it is melting to ensure you don’t get any weird streaks in the end, until all the chocolate has melted.
  2. Pour away 3/4 of the water you used, and add some room temperature tap water back in your sous vide (in order to bring the temperature down faster). Set the temperature to 27°C (81°F), and put the bag containing the chocolate back to the sous vide. Add some ice cubes if the temperature isn’t dropping fast enough. Massage the chocolate continuously as it cools in the sous vide.
  3. After 3 minutes at this temperature, set the sous vide to 29°C (84°F). Continue to massage the bag. After 5 mins at this temperature the chocolate is ready to use, and you can just hold the chocolate at this temperature until you’re ready to use.

Coffee ganache

  1. (the night before) Roughly chop the coffee beans, and add the cream. Heat until it reaches a simmer, then let cool to room temperature. Cover, and let the coffee steep overnight.
  2. The next day, strain the cream. Taste the cream and if you think the coffee flavour isn’t strong enough add instant coffee to taste.
  3. Bring the cream to a simmer. Meanwhile, finely chop the dark and milk chocolate and place in a heatproof measuring jug.
  4. When the cream has reached a simmer, pour the hot cream over the chopped chocolate and let sit for 1 min. Then blend with an immersion blender until smooth.
  5. When the mixture has cooled down slightly (to about 40°C), add the unsalted butter and blend again until smooth.
  6. Let ganache cool to room temperature before using.

Assembly

  1. Pour the tempered chocolate over the chocolate mould, ensuring the chocolate fully coats the sides of the cavities. Tap on the sides of the mould to release any air bubbles.
  2. Invert the mould onto a clean surface, and let the chocolate drip out onto the clean surface. When the chocolate has dripped out, clean the surface of the mould with a bench scraper, and let the mould set at room temperature while still inverted. Collect the leftover chocolate that has dripped out and reuse.
  3. When the chocolate has set, fill the mould up with the ganache, leaving some room for some chocolate to go on top (don’t fill the truffle past the top).
  4. Cover the ganache with chocolate, tapping on the sides of the mould to release air bubbles. Scrape off any excess chocolate.
  5. Let the truffles set at room temperature, then unmould the truffles by turning the moulds over and tapping the mould sharply onto a surface.
  6. Decorate the truffles by placing a coffee bean on top, using a bit of melted chocolate as the glue.
  7. Store truffles in airtight container at room temperature.

dulce de leche truffles

Probably the best effort-to-payoff ratio flavour of the bunch, pre-made dulce de leche is a godsend and I’ve never really noticed an improvement with homemade dulce de leche.

salted-dulce-de-leche-truff

I paired the dulce de leche with a bit of flaky sea salt, and dark chocolate to balance out the sweetness.

Ingredients (makes about 12)

  • About 200g dark chocolate (>=70%)
  • Canned dulce de leche
  • Some flaky sea salt
  • Some food-safe gold spray (for decoration, optional)

Method

Tempering chocolate

  1. Finely chop the chocolate and add it to a waterproof bag. Place the bag in a sous vide set to 46°C (115°F). Massage the chocolate as it is melting to ensure you don’t get any weird streaks in the end, until all the chocolate has melted.
  2. Pour away 3/4 of the water you used, and add some room temperature tap water back in your sous vide (in order to bring the temperature down faster). Set the temperature to 27°C (81°F), and put the bag containing the chocolate back to the sous vide. Add some ice cubes if the temperature isn’t dropping fast enough. Massage the chocolate continuously as it cools in the sous vide.
  3. After 3 minutes at this temperature, set the sous vide to 32°C (90°F). Continue to massage the bag. After 5 mins at this temperature the chocolate is ready to use, and you can just hold the chocolate at this temperature until you’re ready to use.

Assembly

  1. Pour the tempered chocolate over the chocolate mould, ensuring the chocolate fully coats the sides of the cavities. Tap on the sides of the mould to release any air bubbles.
  2. Invert the mould onto a clean surface, and let the chocolate drip out onto the clean surface. When the chocolate has dripped out, clean the surface of the mould with a bench scraper, and let the mould set at room temperature while still inverted. Collect the leftover chocolate that has dripped out and reuse.
  3. When the chocolate has set, sprinkle a bit of sea salt into each mould, then fill with dulce de leche, leaving some room for some chocolate to go on top (don’t fill the truffle past the top).
  4. Cover the dulce de leche with chocolate, tapping on the sides of the mould to release air bubbles. Scrape off any excess chocolate.
  5. Let the truffles set at room temperature, then unmould the truffles by turning the moulds over and tapping the mould sharply onto a surface.
  6. Decorate the truffles by spraying a little bit of food-safe gold spray.
  7. Store truffles in airtight container at room temperature.

valrhona ganache

The maverick of the four truffles, this is a melt-in-your-mouth ganache coated with the thinnest coating of melted chocolate and cocoa powder.

20200222_174052 copy

This is where it’s really important to buy good chocolate as there is no hiding behind fancy flavours here. I went with Valrhona 70% Guanaja although the original recipe by Robert Linxe uses Valrhona 56%. But I just really like the Guanaja chocolate and I was very happy with the end result.

20200222_191122 copy

I cheaped out and did not get high quality cocoa powder but I highly recommend that you do as I say and not as I do and splurge on some good cocoa powder (Robert Linxe recommends Valrhona).

The recipe can be found here, although I (bravely enough) quartered the recipe and thought the final product was still great. The quantities for the reduced recipe is below

Ingredients (makes about 15 truffles if you follow the recipe below or 25 truffles if you don’t follow instructions like me)

  • 80g good chocolate (original recipe used 56% but I used a 70% chocolate and it turned out fine)
  • 40mL heavy cream
  • Some cocoa powder to dust

Method

  1. Finely chop 70g of the chocolate and put into a bowl.
  2. Bring heavy cream to a boil in a small saucepan, and when it starts to simmer, pour the cream over the chocolate, mashing any big pieces with the back of a spoon.
  3. Whisk the mixture in concentric circles (but don’t beat or you’ll incorporate air), starting in the center and working your way to the edge, until the ganache is smooth.
  4. Let stand at room temperature until thick enough to hold a shape, about 1 hour, then, using a pastry bag with a 3/8-inch opening or tip, pipe into mounds (about 3/4 inch high and 1 inch wide) on parchment-lined baking sheets. When piping, finish off each mound with a flick of the wrist to soften and angle the point tip. Freeze until firm, about 15 minutes.
  5. Meanwhile, pour some cocoa powder (enough to coat the truffles) into a wide dish.
  6. When the truffles have frozen, melt the rest of the chocolate and smear some on a gloved hand. Gently rub each chilled truffle to coat lightly with the chocolate.
  7. Toss the truffles into the cocoa powder, and use a fork to toss the truffles in the cocoa powder. Shake the truffles in a sieve to get rid of any excess cocoa powder.
  8. Store the truffles in an airtight container in the refrigerator.

Doritos Croissants

Doritos! Compound! Butter!!!

86275937_268492047462934_1416493236561641472_n copy

It’s that time of the year again where I bring out a work surface to the coldest room in my apartment, put on a coat, and make my annual batch of croissants.

dorito-croissant-fold

This year though I was feeling extra unhealthy and wanted to make doritos flavoured croissants. In particular my favourite flavour spicy sweet chili doritos.

dorito-croissant-fold-2

I do wish I put in a bit more doritos powder to really amp up that flavour though (I’ve increased the amount of doritos powder used in the recipe below).

20200209_222102 copy

Surprisingly the doritos dust sprinkled on top of the croissants did not burn in the oven and instead added a good amount of flavour to each croissant.

20200209_224921 copy

Flakey!

dorito croissant

I also do not see why this would not work with any chips/snack of your choice. So run wild – flaming hot cheetos croissants perhaps???

croissant cross shot

The recipe was originally from here, but I’ve since made some changes to the method and of course added in the doritos to the butter.

Ingredients (makes 15)

Dough

  • 500g all purpose flour
  • 140g water
  • 140g full-fat milk
  • 55g sugar
  • 40g softened unsalted butter, room temperature
  • 11g instant yeast
  • 12g salt

Others

  • 280g cold unsalted European-style butter (for laminating, see notes)
  • About 1 cup crushed doritos + some extra for decorating
  • 1 egg + 1 tsp water for egg wash

Method

Dough (night before)

  1. Combine dough ingredients and knead until the dough comes together and forms a smooth ball.
  2. Cover and let the dough rest for 10 mins.
  3. Stretch and fold the dough ball, cover, and let the dough rest for 10 mins.
  4. Repeat step 3, but this time let the dough rest for 30 mins.
  5. Shape the dough into a square 26cm x 26cm, cover, and let rest in the fridge overnight.

Lamination

  1. Process some doritos in the food processor until fine but still a little chunky, and set some aside for decoration. Then process the rest of the doritos until very fine.
  2. Mix about a cup of very fine doritos dust into 280g cold European-style butter that has been cut into roughly 1.25cm thick slabs.
  3. Pound the butter (incorporating the doritos in the process, it doesn’t have to be uniformly incorporated) until you get a butter square about 19cm x 19cm (it’s easier to roll it out by pounding instead of actually rolling since the butter is so cold).
  4. Trim the edges of the butter until the square is 17cm x 17cm and place the trimmings on top of the square. Pound slightly to even the butter square out. Put the butter back in the fridge, and leave it in until it is very cold again, maybe about 20 mins.
  5. Take the dough out of the fridge and place on a lightly floured surface.
  6. Take the butter out of the fridge and put the butter on top of the dough square but rotated by 45° (so if the dough square is a square the butter should be a diamond on top).
  7. Fold the flaps of dough over the butter so they meet in the center of the butter. The edges should overlap so they fully enclose the butter. Press on the edges to seal the seams so the butter is fully enclosed.
  8. Roll out the dough with a lightly floured rolling pin to a rectangle about 20 x 60cm long, rolling from the center of the dough to the edges and rotating the dough 180° every once in a while. This helps keep the dough at an even thickness. Try to keep the edges as straight as possible. If the dough resists (ie stretches back smaller when you try to roll it out), cover and let rest in the fridge for about 20-30 mins before trying again. Don’t try to fight it too much or your butter might tear through the dough and you’ll lose the layers in the croissant.
  9. Fold the dough letter style (fold 1/3 of the dough over, and then 1/3 from the other end over so you should end up with a 20cm x 20cm square again).
  10. Cover with clingfilm and refrigerate for 30 mins.
  11. Repeat steps 4-9 again two more times, turning the dough 90° each time before rolling out again (so the open end is towards you and the smooth edges are at the sides).
  12. At this point you could put the dough in the fridge overnight to roll out the next day, or you could go straight to proofing after an hour in the fridge if you’re impatient like me (this might affect your proofing time though, see notes).

Shaping

  1. Take the dough out of the fridge and place on a lightly floured surface, with the open end towards you. Roll out the dough to 20 cm x 110 cm.
  2. Carefully lift it a few centimeters to allow it to naturally shrink back from both sides and roll it out again if needed to get to the right length.
  3. Trim the edges off so your dough is about 100cm long.
  4. Make marks every 12.5cm along the length of the top edge.
  5. For the bottom edge, start at 6.25cm and then make marks at every 12.5cm (so each cut at the bottom edge is in the middle of each cut at the top edge).
  6. Make diagonal cuts from the top corner down to the bottom mark to create triangles.
  7. For each triangle, place on a lightly floured surface and make a short 1.5cm notch at the base of each triangle. Roll out each triangle gently to about 25cm in length. Sprinkle some crushed doritos over the triangles.
  8. Roll up the triangle from the base by rolling the dough away from the center using both hands, trying to make the ends a little narrower. Try to roll tightly so the layers stick together (but not tight enough to destroy the layers).
  9. Arrange the shaped croissants on a baking sheet lined with baking paper, leaving enough space between the croissants for proofing and baking.
  10. Make an egg wash by whisking the egg with a teaspoon of water.
  11. Lightly egg wash the croissants.
  12. Cover, and allow the croissants to prove until the croissants are visibly larger and they wiggle when you shake the baking sheet (about 2 hours). The layers of dough should be visible when your croissants are viewed from the side (see notes).
  13. Preheat the oven to 220°C.
  14. When the croissants have finished proofing, give the croissants a second egg wash and sprinkle some of the chunkier crushed doritos set aside earlier.
  15. Bake in the preheated oven. After the croissants go in, immediately lower the temperature of the oven to 200°C and bake for 10 mins. Then lower the temperature to 170°C and bake for another 6 minutes.
  16. Leave for a few minutes on the baking sheet before transferring to a cooling rack.

Notes

  • This video was useful in how to shape the dough and butter in a perfect square.
  • All timings listed are a general guide. It’s better to follow the description (eg doubled in size) rather than the timings, as the timing depends on many factors like the activity of your yeast, or the surrounding temperature.
  • Ideally, you should proof your croissants at 24ºC-26.5ºC/76ºF-79ºF as above that temperature the butter may leak out and any lower it’d take forever to proof like mine did.
  • My baking temperatures are about 20ºC higher than the recipe source’s because they used a powerful fan-assisted oven and I just have a measly normal oven. Feel free to use the original temperatures if your oven is fan-assisted.
  • If you’re using active dry yeast instead of instant yeast, you might have to activate the yeast first. Warm up the milk that was supposed to go into the bread till it’s about body temperature, and then add the yeast into the milk. When the mixture is foamy (about 5-10 mins later), add the yeast-milk back into the bread at the step where the milk is supposed to be added. Although I still recommend using instant yeast because apparently it’s better for cold proofing.
  • European-style butter has a higher fat content/lower water content than normal American butter so your croissants are flakier. Although I guess if you’re not in America this is just butter. Basically American butter is about 80% milk fat and European-style butter is like 82-84% or higher.
  • These croissants freeze well! Just allow to cool fully and when reheating put in a preheated 180ºC oven for 8 mins straight from the freezer.
  • If you need more gifs to how to fold the croissants there are some in my previous corissant post.

Triple Pistachio Buns

When the byproduct of making pistachio ice cream is really really good pistachio paste.

rolling

So there’s pistachio in the dough, in the filling, and in the whipped cream that goes on top.

buns

The buns go into the fridge to proof for 1-2 nights for that extra ~flavour development~, and also so you can have freshly baked buns in the morning (which is necessary because the buns don’t keep well).

pistachio buns

Everything’s finished off with a nice dollop of pistachio whipped cream right before serving, to add some lightness and extra pistachio flavour.

This recipe is from Stella Parks.

Ingredients

Pistachio paste (if you’re making them from the leftover pistachios from pistachio ice cream, otherwise use storebought)

  • About 2 cups of blanched, peeled, and toasted pistachios (about 255g, or just use the leftovers from the ice cream)
  • 280g powdered sugar
  • 2g salt
  • 55g neutral oil (or use roasted pistachio oil if you fancy)

Pistachio filling

  • 210g pistachio paste, room temperature
  • 55g unsalted butter, room temperature

Dough

  • 510g all purpose flour
  • 2 tsp instant yeast (see notes)
  • 8g salt
  • 285g pistachio paste, room temperature
  • 225g plain unsweetened Greek yogurt, room temperature
  • 115g milk, room temperature (any percentage)
  • 55g neutral oil (or roasted pistachio oil if you fancy)
  • 115g (just shy of a cup) of pistachios (preferably blanched, peeled, and toasted if you have the time for extra flavour)

Pistachio whipped cream

  • 170g heavy cream
  • 70g pistachio paste, room temperature

Method

Pistachio paste

  1. In a food processor, grind the pistachios till smooth.
  2. Once a smooth, oily paste has formed, add the powdered sugar and salt and continue processing until smooth and thick.
  3. With the machine still running, drizzle in the oil and continue processing until silky and pale.
  4. Store in an airtight temperature for room temperature for up to a week, or in the fridge for up to a month. Bring to room temperature before use.

Pistachio filling

  1. Beat the pistachio paste and butter together in a large bowl until creamy and smooth.
  2. Transfer the paste+butter mixture to a pastry bag and set aside.

Dough

  1. In a large bowl (you can just use the same bowl you beat the pistachio paste and butter in without washing), whisk the flour, yeast, and salt together until thoroughly combined.
  2. In a measuring cup, blend the pistachio paste, Greek yogurt, milk, and oil with an immersion blender until well blended.
  3. Add the wet ingredients to the flour mixture and knead until smooth and elastic, or at windowpane stage, which will take a while just keep kneading.
  4. Cover and let rise until doubled in size, about 2 hours.
  5. Turn dough out onto a lightly floured surface and roll into a 13 inch square. Snip the tip off the pastry bag containing the pistachio filling and squeeze over the dough, then spread out into an even layer using an offset spatula. Sprinkle pistachios on top.
  6. Roll the dough like a Swiss roll into a log, ending seam side down.
  7. Using a sharp serrated knife, gently cut the log into 12 pieces, using gentle sawing motions so you don’t ruin the shape of the rolls. Arrange the rolls in a parchment-lined pan (I used a 9x13x2 inch baking pan but you can use whatever works like cake pans).
  8. Cover the rolls and refrigerate overnight or up to 48 hours.

Frosting

  1. In a measuring cup, blend the pistachio paste and cream using an immersion blender until the mixture is creamy and thick.
  2. Transfer to an airtight container and refrigerate until needed, up to 48 hours. I kept mine in a pastry bag so I can pipe the cream on at the end.

Assembly

  1. When ready to serve, preheat the oven to 350°F/180°C.
  2. Meanwhile let the pistachio buns stand at room temperature until the oven is preheated.
  3. Bake the buns, covered with aluminum foil, until the pistachio buns are puffed and firm, but still pale, about 35 mins. Start checking at around 30 mins.
  4. Remove the foil and continue baking until lightly browned, about 15 mins more.
  5. Let the buns cool for about 15 mins before eating so the crumb can set.
  6. Serve with a dollop of frosting.

Notes

  • All timings listed are a general guide. It’s better to follow the description (eg doubled in size) rather than the timings, as the timing depends on many factors like the activity of your yeast, or the surrounding temperature.
  • Stella Parks really insists on using instant yeast here over active dry yeast since instant yeast is apparently better for the cold rise.
  • Absolutely only add the cream right before serving or the cream will just melt into the buns as I learnt the hard way.
  • I like to use a measuring cup to blend things with my immersion blender because it’s the perfect size – big enough that the blender can reach the bottom but small enough that the blender can really reach everything it’s supposed to blend.

Pistachio Ice Cream with Dulce de Leche Swirl and Candied Pistachios

No pistachio paste needed!

pistachio-blanching

Hey, have you ever wanted to spend 2.5h peeling the skin off pistachios? And I mean the SKIN, not the shell. Boy have I got the recipe for you.

pistachio-toasting

So I was on the hunt for a good alternative to making pistachio ice cream without buying pistachio paste. It’s really difficult to find a good quality pistachio paste at an affordable price, and it’s also difficult to make a paste fine enough at home such that it doesn’t affect the texture of the ice cream.

pistachio-draining

But then I came across a recipe by Stella Parks on Serious Eats that utilises an overnight cold infusion of toasted pistachios into milk. The only catch? You have to blanch and peel the pistachios. She goes into paragraphs of explanation on how that improves the flavour of the final product, and so I was convinced.

20200202_084838 copy

And the final product did indeed have an impressive complexity of flavour – you definitely get the taste of pistachios but with floral and nutty flavours that I would have expected out of very expensive pistachio pastes made from Sicilian pistachios. And most of my friends certainly liked it, with many saying that this is now their new favourite ice cream that I’ve made.

This was probably helped out by the addition of the tiniest amount of rosemary and lime peel in the overnight soak step. Apparently they contain an aromatic called alpha-Pinene which is found in toasted pistachios, which can help boost the flavour of perhaps less-than-stellar pistachios which are easier to find.

20200202_085659 copy

I swirled some dulce de leche in just to add little pockets of creamy sweetness and also candied some pistachios for texture.

pistachio ice cream

Bonus points: pistachio paste can be a byproduct of this recipe, which can then be used in another recipe – Stella Park’s pistachio buns which I made here.

The general recipe is from here, but I used my usual ice cream base recipe instead from Salt and Straw’s cookbook. The recipe for the candied pistachios is adapted from here.

I’ve changed the quantity of the milk/cream used in the recipe below since the pistachios do absorb some liquid in the overnight soaking process.

Ingredients

Pistachios for ice cream

  • About 255g of raw, shelled pistachios (about 2 cups)
  • 1 tsp neutral oil, preferably roasted pistachio oil if you fancy like Stella Parks but I just used a neutral vegetable oil
  • 1 sprig rosemary
  • 1 lime

Ice cream base

  • 2 cups whole milk (473g)
  • 2 cups heavy cream (450g)
  • 1/2 cup sugar (100g)
  • 2 tbsp dry milk powder (12g)
  • 1/4 tsp xanthum gum (see notes)
  • 2 tbsp light corn syrup (45g)

Candied pistachios (will make more than you need but they make a great snack)

  • 1 1/4 cups raw, shelled pistachios (about 225g)
  • 3/4 cup granulated sugar (150g)
  • 1 tsp fine salt
  • 1 tsp flaky salt (to finish)
  • 1/4 cup water

Finishing

  • About 1/2 cup dulce de leche (I just used canned dulce de leche)
  • Food colouring (optional)

Method

Pistachios for ice cream (2 days before serving)

  1. Blanch and peel the pistachios
    1. Soak the pistachios in cold water for 5 mins, then heat them in a saucepan until the water is steaming-hot (but not simmering/boiling).
    2. Then, when the skins are loose enough to slip off a test pistachio, drain the nuts into a colander and rinse with cold water until they’re easier to handle (hot pistachios may just crumble under pressure).
    3. Peel the pistachios by gently pinching off the skins – you might want to keep a large bowl of water nearby so you can readily wash the skins off your hands as they tend to stick. Watch a movie or something while you do this. Toss any ugly pistachios (blackened/withered).
  2. Drizzle the peeled pistachios with the oil, and toss to coat evenly.
  3. Spread over a parchment-lined pan and place in a cold oven.
  4. Heat the oven to 200°F/90°C, and dry the pistachios until they feel firm to the touch and have a slight golden hue starting to develop, about 3h. This timing can be very variable, so start checking around 2h and check in every 30mins to see if it’s done. Don’t try to speed things up with a higher temperature as low and slow gives you the best toasted flavour.
  5. When the pistachios are done, cool them to room temperature. Then roughly chop them.
  6. In a saucepan, combine the pistachios with 2 cups of milk and 2 cups of cream (from the ice cream base). Add about a 1 1/4-inch sprig of rosemary and a 3/4 by 1/4 inch strip of lime zest to steep together with the pistachios. Bring everything to a simmer over medium heat, and take off heat the moment the dairy reaches a simmer.
  7. Transfer to an airtight container and refrigerate overnight, or up to 36 hours.
  8. Return the chilled pistachio-infused dairy to a simmer in a saucepan, then strain through a mesh sieve into a large bowl. You can use the leftover pistachios to make pistachio paste for some other snack.

Ice cream (the day before serving)

  1. Measure out 2 2/3 cups of the pistachio-infused milk/cream mixture.
  2. Combine the sugar, milk powder, and xanthum gum in a saucepan and mix well. Then add the corn syrup and the pistachio-infused milk/cream mixture.
  3. Heat over medium heat, stirring often and adjusting the heat to prevent a simmer, until the sugar has fully dissolved (about 3 mins). Remove the pot from the heat.
  4. Colour correct the ice cream mixture. It will likely be a slight yellow at this stage, so add a bit of blue to balance it out. You might also want to keep some green and/or yellow food colouring on hand in case you add too much blue (like I did) so you had to make more adjustments. Try to keep things subtle you don’t want an electric green ice cream.
  5. Transfer the mixture to an airtight container and refrigerate until well chilled, at least 6 hours but preferably overnight.

Candied pistachios

  1. Preheat oven to 225°F/110°C.
  2. In a saucepan, add the sugar, salt, and water. Stir until all the sugar is moistened.
  3. Spread the pistachios out in a single layer over a baking sheet, then bake in the oven for about 10 minutes.
  4. Meanwhile, heat the saucepan containing the sugar mixture over medium-high heat, stirring occasionally. Once it starts boiling stop stirring. Boil until the sugar reaches 238ºF/115ºC.
  5. Remove the saucepan from heat and dump the toasted pistachios into the saucepan.
  6. Stir well until the pistachios are completely coated with sugar mixture, and keep stirring until the sugar starts looking like wet sand rather than syrup.
  7. Spread the nuts out onto a parchment-lined baking sheet, spreading them out and breaking apart any large pieces. Sprinkle on about 1 tsp of flaky sea salt, then let cool completely, at least 1h.
  8. Store in an airtight container for up to 1 week.

Assembly

  1. Pour the mixture into an ice cream maker and turn on the machine, and churn until the mixture has the texture of soft-serve. Meanwhile set aside about 1/2 cup of candied pistachios and 1/2 cup of dulce de leche. Also cover a metal bowl with clingfilm (so ice doesn’t form) and place in the freezer.
  2. When the ice cream is ready, dump the ice cream out into the bowl you placed in the freezer and fold in 1/2 cup of dulce de leche.
  3. Transfer half of the ice cream into a freezer-friendly container. Then sprinkle on half of the candied pistachios you set aside earlier. Repeat with a layer of ice cream, then the rest of the candied pistachios.
  4. Cover the ice cream with parchment paper (I think this is to prevent freezer burn), pressing it to the surface of the ice cream so it adheres, and cover with a lid.
  5. Freeze the ice cream until solid.

Notes

  • Xanthum gum is a thickener/stabiliser commonly used in vegan/gluten-free baking, so that’s where you might find them in the supermarket. I got the Bob’s Red Mill brand.
  • If you’re using an ice cream maker which bowl needs to be frozen beforehand, make sure to cover the bowl with clingfilm so ice crystals won’t form in the bowl and cause your ice cream to have a sandy texture. Also to be safe, freeze the bowl for at least 2 days and at the coldest setting your freezer will go.
  • My ice cream maker takes about 20-30 minutes to reach soft-serve consistency.
  • Optionally, you can throw in some kind of almond liqueur (about 1 tbsp) into the ice cream mixture before you churn, but I didn’t

Blueberry Sourdough

A e s t h e t i c s.

breadrise

What can I say? It’s a great sourdough with a mildly sweet crumb and puddles of tart burst blueberries.

20200126_125543 copy

This might taste better if blueberries were actually in season (my blueberries were definitely on the tart and not sweet side), but hey it still tastes good. Especially when slathered in butter and/or jam.

blueberry sourdough

Check out my new snake plant it’s cute.

blueberry sourdough cut

I got this recipe from Crusts, but changed the method of it.

Ingredients

  • 400g bread flour
  • 100g whole wheat bread flour
  • 150g mature active sourdough starter
  • 350g water
  • 70g sweetened condensed milk
  • 9g salt
  • 180g fresh blueberries (about 1 1/2 cups)

Method

  1. In a large bowl, combine all the ingredients except the salt and blueberries. Knead until the dough starts to come together, then let rest (autolyse, see notes) for 20 minutes.
  2. Add the salt and knead together until the salt is fully incorporated. Then gently fold in the blueberries without breaking the blueberries (I used the pincer and fold method) until the blueberries are well distributed.
  3. Stretch and fold your dough. Cover, and leave for 30 mins.
  4. Repeat step 3 two more times, then let the dough rest at room temperature, covered, for about 2 hours or until slightly risen in size (I’d say about 1.5x-2x the original size).
  5. Shape the dough and transfer to a well-floured banneton.
  6. Cover and let rise in the fridge overnight.
  7. The next day, take the dough out and leave at room temperature for about 2 hours, or until the dough is completely at room temperature.
  8. About 30 mins before you’re ready to bake, place a dutch oven into an oven and preheat to 260°C.
  9. Turn the dough out of the banneton and onto a floured surface. Take the dutch oven out of the oven. Carefully place the dough into the dutch oven, and score the dough. Cover and return the dutch oven to the oven.
  10. Bake the bread at 260°C for 30 mins with the lid of the dutch oven on.
  11. After 30 mins, take the lid off and reduce the temperature of the oven to 220°C. Bake for an additional 20 mins.
  12. Remove the dutch oven from the oven, and transfer the bread to a cooling rack.
  13. Let the bread cool for at least 1h before cutting.

Notes

  • My starter was at 100% hydration. If you have no idea what I’m talking about check out my previous recipe on classic white sourdough.
  • Autolysing just means letting your flour sit with the water before you add any salt or yeast. This is supposed to make the bread easier to handle and have better structure and taste since the flour absorbs the water or something. More here.
  • Turning and folding is just an alternative method to build structure in the dough usually used for higher hydration sourdoughs, but it can be used for any bread really. Up to your personal preference.
  • Scoring helps direct the shape your bread will rise when baked. And it looks pretty.
  • If you don’t have a dutch oven, you can try baking it like I used to, for example in this recipe.